How to Flush Houseplant Soil: Remove Salt Buildup
The white crusty residue around the rim of my terracotta pots used to baffle me. I thought it was mold, or maybe some kind of mineral bloom. It wasn't until my peace lily started developing consistent brown tips and a fertilizer-burned appearance — despite what I thought was a sensible feeding schedule — that I traced the issue back to salt buildup in the soil. Years of tap water irrigation and regular fertilizing without ever flushing the medium had created a concentrated chemical environment that was actively burning the roots. Once I understood what flushing was and why it mattered, I added it to my regular plant maintenance routine — and the improvement was immediate and striking.
What Is Salt Buildup and Why Does It Happen?
In the context of houseplant care, "salts" refers not just to table salt but to the full range of mineral salts left behind by two sources: tap water and fertilizer. Most municipal tap water contains dissolved minerals — calcium, magnesium, chloride, fluoride, and others — that are present in concentrations safe for drinking but accumulate in potting medium over time as water evaporates and minerals are left behind. Fertilizer compounds — even organic ones — similarly leave mineral residues in the soil after their nutrient components have been absorbed or leached out.
In outdoor garden beds, rainfall naturally flushes these salts downward through the soil profile and away from the root zone. Houseplants in pots have no such mechanism. Every watering adds a tiny amount of minerals; every evaporation cycle concentrates them slightly. Over months and years, soil salt levels can rise to the point where osmotic pressure reverses — instead of water moving from soil into roots, it's drawn out of roots by the concentrated salt solution surrounding them. This is fertilizer burn, and it looks like browning leaf tips, yellowing, and wilting even in a well-watered plant. According to University of Maryland Extension's houseplant care guides, salt accumulation from fertilizer and tap water is one of the most commonly overlooked causes of chronic houseplant decline, particularly in plants that have been in the same container and medium for two or more years without repotting.
How to Identify Salt Buildup in Your Houseplants
The most visible sign is white, crusty residue on the soil surface, on the interior rim of terracotta pots, or on the outside of the pot (terracotta's porosity allows salts to wick through and crystallize on the surface). This crust is a combination of calcium carbonate and fertilizer salt deposits — a reliable indicator that significant mineral concentration has occurred in the medium below.
Plant symptoms of salt stress include consistent browning and crisping at leaf tips (even in adequately watered plants), yellowing that starts at leaf margins, slowed growth despite good light and feeding, and wilting that doesn't resolve promptly after watering. In severe cases, roots will appear brown, dry, and burned rather than white and firm. If you see a combination of the white crust and these leaf symptoms, flushing is indicated before any other intervention.
When to Flush Houseplant Soil
A general maintenance flush — sometimes called a "leaching" — is worth doing proactively once or twice a year for any houseplant you fertilize regularly or water with tap water. I typically do a thorough flush in early spring before ramping up my fertilization schedule for the growing season, and again in early fall before pulling back on feeding for winter. This preventive approach keeps salt levels low and means I rarely see the acute salt-burn symptoms that prompted me to start the practice in the first place.
Beyond the scheduled maintenance flush, flush immediately when: you see significant white crust on the soil surface or pot, your plant shows leaf tip browning or margin yellowing that isn't explained by watering or light issues, or you've been fertilizing heavily and notice a sudden decline in plant appearance. Gardening Know How's soil and fertilizer guides recommend flushing as a first response to suspected fertilizer burn or salt stress before attempting any other remediation, noting that it's the safest and most immediate way to reduce chemical stress on roots.
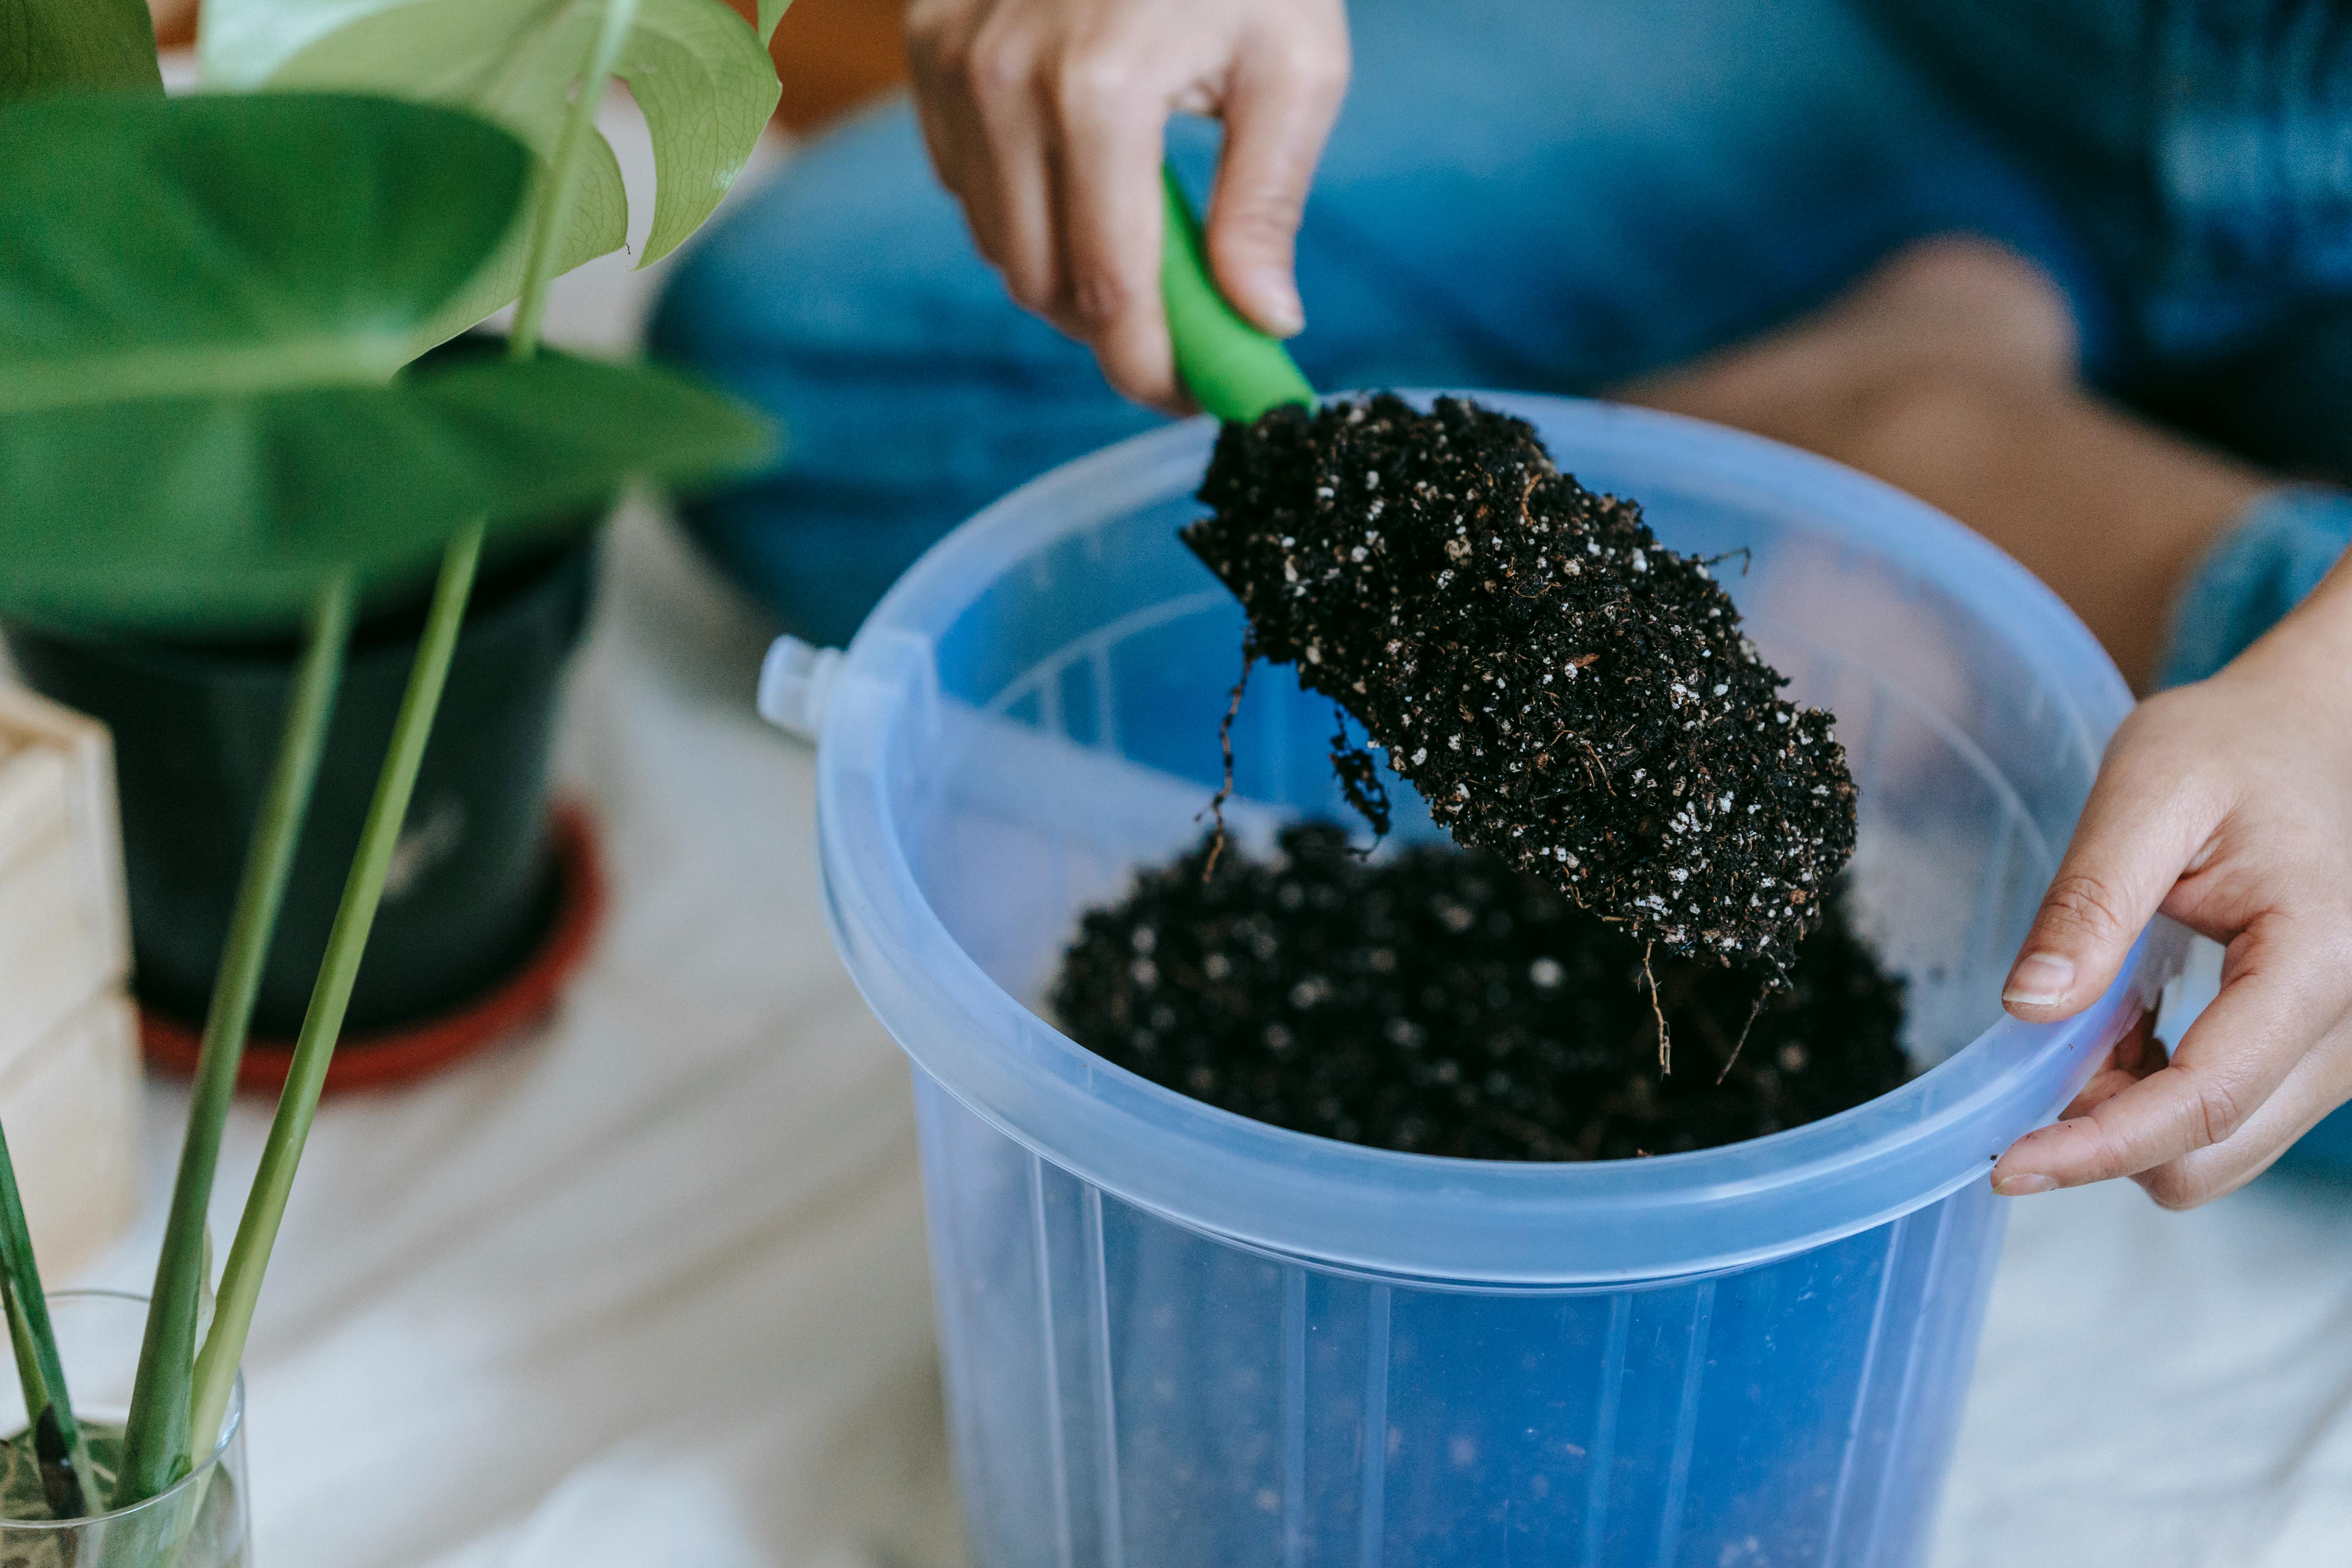
Step-by-Step: How to Flush Houseplant Soil Correctly
- Choose the right time: Flush during the plant's active growing season when possible — spring or summer. Avoid flushing during winter dormancy, as wet soil combined with slower growth and lower light can increase root rot risk.
- Use the right water: Room-temperature water is essential. Cold water can shock tropical roots. Filtered, distilled, or rainwater is ideal if your tap water is very hard, but room-temperature tap water works adequately for most plants and most situations.
- Position for drainage: Take the plant to a sink, bathtub, or outside if possible. You're going to be adding a large volume of water — enough to flush through thoroughly — so you need somewhere for it to drain freely.
- Water slowly and thoroughly: Add water slowly and consistently to the soil surface, allowing it to pass through the medium and drain from the bottom before adding more. The goal is to pass a volume of water equal to approximately twice the volume of the pot through the soil — so for a one-gallon pot, you're running roughly two gallons of water through it.
- Allow full drainage: Let the pot drain completely for 15 to 30 minutes after the final water addition. Don't rush this — you want as much of the salt-laden water as possible to exit the pot before returning it to its saucer.
- Withhold fertilizer temporarily: After a flush, wait at least two to four weeks before resuming fertilization. The flushing process also removes some beneficial nutrients, and the root system needs recovery time before being exposed to fertilizer salts again.
- Resume fertilization at reduced strength: When you do resume feeding, use a half-strength dose for the first two to three applications before returning to your normal rate.
According to The Spruce's indoor plant care resources, the twice-the-pot-volume water guideline for flushing is a widely accepted standard in horticultural practice, ensuring that enough water passes through to dissolve and carry away accumulated mineral deposits throughout the depth of the root zone.
Will Flushing Hurt My Plant's Roots?
Done correctly — with room-temperature water and full drainage — flushing does not damage healthy roots. The roots of most houseplants are adapted to periodic heavy rainfall events in their natural environment that serve exactly this leaching function. The key precautions are: don't use cold water (thermal shock is a real risk for tropical species), ensure complete drainage after the flush (don't leave the pot sitting in a puddle of the flush water it just expelled), and don't flush plants that are already severely root-bound or in decline from other causes, as stressed root systems have reduced resilience.
Some particularly sensitive species — orchids, certain ferns, and some bromeliads — should be flushed with extra care, using only distilled or rainwater to avoid any additional mineral introduction. For most common houseplants (pothos, monstera, peace lily, snake plant, philodendron), a tap-water flush with room-temperature water poses minimal risk when drainage is adequate. Missouri Botanical Garden's plant care resources confirm that regular leaching is a standard and recommended maintenance practice for container-grown plants, particularly those kept indoors year-round without seasonal rainfall exposure.
Preventing Salt Buildup Between Flushes
Prevention is easier than remediation. Several habits reduce the rate at which salts accumulate between scheduled flushes: watering deeply and thoroughly each time (shallow watering prevents dilution of accumulated salts at the lower root zone), using filtered or collected rainwater when possible (especially for fluoride-sensitive species like spider plants, dracaenas, and peace lilies), fertilizing at half strength rather than full strength, and repotting into fresh medium every one to two years. Repotting is the most effective salt-reset of all — it removes the accumulated mineral environment entirely and starts fresh.
Common Mistakes When Flushing Houseplant Soil
- Using cold water: Can thermally shock tropical roots. Always use room-temperature water.
- Not allowing complete drainage: The flush water carries dissolved salts — leaving the pot to sit in it defeats the purpose.
- Flushing in winter: Cold, wet soil during dormancy increases rot risk significantly. Stick to spring and fall flushes.
- Resuming heavy fertilization immediately: Give roots two to four weeks of recovery time after a flush before reintroducing fertilizer.
- Confusing flush water volume with normal watering: A flush uses two to three times more water than a normal watering — it's a deliberate saturation-and-drain cycle, not routine irrigation.
Quick Reference Care Table
| Flush Factor | Recommendation | Avoid |
|---|---|---|
| Frequency | Once to twice per year (spring and fall) for regularly fertilized plants | Flushing in winter or during dormancy |
| Water temperature | Room temperature (65–75°F) | Cold tap water direct from faucet |
| Water volume | 2x the pot volume passed through the medium | A single normal watering volume |
| Water quality | Filtered or distilled preferred; room-temp tap water acceptable | Very hard tap water with high mineral content (for sensitive species) |
| Post-flush care | Full drainage; 2–4 week wait before fertilizing; half-strength first feed | Leaving pot in flush water; resuming full fertilization immediately |
| Signs to flush now | White crust on soil/pot; brown leaf tips; wilting despite adequate water | — |
Frequently Asked Questions
How do I know if I've flushed enough?
The most reliable sign is that the water coming out of the drainage hole runs clear rather than discolored or slightly cloudy with dissolved minerals. In practice, following the two-times-the-pot-volume guideline is sufficient for most situations. For plants showing significant white crust on the soil surface, you may want to err toward three times the pot volume for the initial remediation flush.
Can I use a fertilizer flush — adding dilute fertilizer in the flush water — to refresh the soil at the same time?
No — this defeats the purpose of flushing. The entire goal is to remove mineral accumulation from the medium, not add to it. Always flush with plain water only, then wait two to four weeks before reintroducing any fertilizer at half strength. Combining the two is one of the most common mistakes growers make when first learning about soil flushing.
My plant has been in the same pot and soil for four years without flushing — is it too late?
It's rarely too late to flush, though a plant with four years of salt accumulation may also benefit from full repotting into fresh medium. If the plant is showing active symptoms of salt stress (brown tips, margin yellowing, wilting despite watering), flush first as an emergency measure, then evaluate whether repotting is warranted. If roots are healthy after the flush, continue regular maintenance flushes. If roots show damage, repot into fresh medium after the flush.
Flushing houseplant soil is one of those simple, low-effort tasks that consistently improves plant health in ways that are sometimes dramatic and always cumulative. Build it into your plant care routine twice a year and you'll notice the difference within a single growing season. Have you flushed your plants' soil yet? Drop your experience in the comments below, and check out our related guides on the best soil mix for monstera plants and why drainage holes are essential for indoor plants.
About the Author
Written by Sage Avery, a plant care writer at Plant Companion Guide. For how we create and update content, see our editorial policy.