Anthurium Clarinervium Care: Velvety Leaves Without the Browning Edges
I bought my first Anthurium clarinervium at a specialty aroid shop after seeing photos of its velvety, heart-shaped leaves online, the kind of plant that looks almost too perfect to exist in real life. What nobody warned me was how quickly those same dramatic leaves develop crispy brown margins if humidity isn't exactly right. Within two months, about one-third of each leaf's edge had browned despite what I thought was careful care. It took another three months of methodical adjustments, a dedicated humidifier, a different soil mix, and a switch to filtered water, before new growth started unfurling perfect and unmarked. This guide is everything I learned during those five months of troubleshooting.
Understanding the Velvet Leaf: Why Humidity Is Non-Negotiable
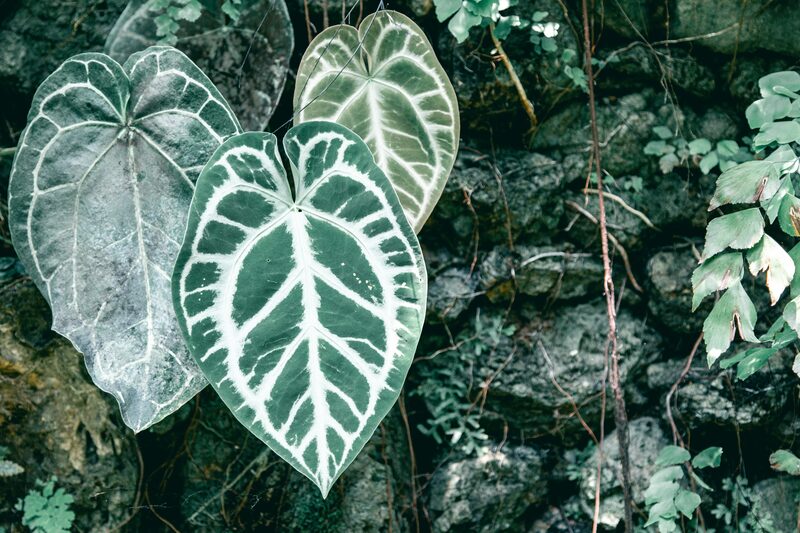
Anthurium clarinervium is native to the limestone outcrops and humid forests of Chiapas, Mexico, where it grows as a terrestrial or semi-epiphytic plant in consistently warm, humid conditions. The velvety texture of its leaves, caused by microscopic papillae on the leaf surface, is an adaptation to its native environment, but it makes the leaves significantly more susceptible to desiccation than smooth-leaved plants. Water evaporates more readily from the increased surface area of those velvet papillae, which is why humidity below 50% causes browning at the margins almost immediately.
The threshold I've established through testing: at 45% ambient humidity, new leaves unfurl with browning already beginning at the margins before they fully open. At 60%, new leaves come in clean to the edges. At 65-70%, the plant performs at its best and the white veining is most vivid. I run a small ultrasonic humidifier about 18 inches from the plant on a timer, with a hygrometer confirming the target range. Pebble trays add approximately 3-5% humidity in the immediate vicinity, not enough to make a meaningful difference at 40% baseline. Misting causes inconsistent humidity and can leave water marks on the velvet surface that are difficult to remove. A dedicated humidifier is the only reliable solution.
According to Gardening Know How's Anthurium care resources, A. clarinervium specifically requires higher consistent humidity than most common Anthurium species, including the widely grown A. andraeanum, due to the unique texture of its foliage. This distinction matters because care advice written for flowering anthuriums doesn't fully apply to this velvety-leaved species.
Light and Watering: Getting the Balance Right for an Epiphyte
Anthurium clarinervium needs bright indirect light, it does not tolerate direct sun, which bleaches and burns the velvety surface within days. An east-facing window two to three feet from the glass is close to ideal: morning sun is gentle enough and the rest of the day is comfortably bright ambient light. I've also grown it successfully under a full-spectrum LED panel at a distance of 18-24 inches for 12-14 hours daily, which produces excellent growth during winter months.
For watering, I allow the top inch of soil to dry between waterings, but because I use a fast-draining aroid mix, this happens more quickly than with standard potting soil. In a 6-inch terra cotta pot in summer, that's roughly every five to eight days. In winter, every ten to fourteen days. The plant's fleshy rhizome stores some water, making it more tolerant of brief drought than of chronic wetness. Root rot develops quickly in this species, soggy soil turns the roots brown and mushy within days, and by the time symptoms appear at the leaves (yellowing, wilting), the root system is often significantly compromised.
Water quality matters more for A. clarinervium than for most houseplants. Fluoride in tap water causes leaf tip and margin browning that looks identical to humidity stress but doesn't respond to humidifying, making it a particularly confusing problem to diagnose. I switched to filtered water eighteen months ago and the distinction between humidity-related browning (which softens and crisps from the edges inward) and fluoride damage (which tends to appear as brown spots or streaks on otherwise healthy leaf tissue) became much clearer once fluoride was eliminated as a variable. For more context on how water quality affects houseplant leaf health, the complete peace lily care guide covers fluoride sensitivity in a closely related humid-environment plant.
The Aroid Mix That Prevents Root Rot
Standard potting mix is too moisture-retentive for Anthurium clarinervium's epiphytic root system. In its native habitat this plant grows in crevices among limestone rocks and in loose forest litter, conditions where roots are exposed to excellent drainage and significant air exchange. Replicating that in a container requires a chunky, free-draining mix that holds some moisture but never becomes waterlogged.
The mix I've used for two years with consistently good results: 40% standard potting mix, 30% perlite, 20% coarse orchid bark, and 10% horticultural charcoal. The charcoal is optional but helps prevent fungal growth at the root level in a high-humidity environment. I use terra cotta pots exclusively, their porosity helps the soil dry more evenly than glazed ceramic or plastic, which is critical when the plant is in 65% ambient humidity from the humidifier. According to Clemson University's Home and Garden Information Center, proper substrate aeration is the most important factor in preventing root rot in container-grown epiphytic aroids, more impactful than watering frequency alone, because a well-draining mix forgives occasional over-watering in a way that dense soil simply cannot.
I repot every one to two years in spring, moving up just one pot size. Repotting in fall or winter is a significant stress event for this plant and can set growth back by several months. The thick, fleshy roots should be handled carefully, they are not as robust as they look and can snap at connections if pulled roughly. For care principles that parallel this aroid approach across the genus, the companion post on growing anthuriums indoors for glossy leaves and repeat blooms covers the andraeanum group in complementary detail.
Fertilizing and Long-Term Leaf Health
I fertilize monthly from April through September with a balanced liquid fertilizer at half strength, applied after watering to protect the roots. Once every six weeks through the growing season I substitute the regular fertilizer with a calcium-magnesium supplement. The difference in leaf quality with and without this supplementation is visible: the white veining is more pronounced, the velvety texture is more consistent, and the leaves are slightly more resistant to mechanical damage. This effect may be partly about the plant's general health in high-humidity conditions where calcium uptake from soil is naturally lower.
Leaf cleaning requires a delicate touch. The velvet surface is easily damaged by rubbing, I use a very soft, barely damp makeup brush to gently dust the surface of each leaf, working with the grain of the papillae rather than against it. Never use leaf-shine products; they coat the velvet surface and compromise gas exchange. Wipe down the undersides of leaves every few weeks to check for early signs of spider mites, which can establish in the humidity-managed environment if ventilation is insufficient.
According to Missouri Botanical Garden's aroid cultivation resources, the cataphylls, the papery sheaths that protect emerging new leaves as they unfurl, should always be left on until they are completely dry and papery before removing them. Peeling a cataphyll from a partially unfurled leaf can cause permanent mechanical damage to the new growth inside, which is irreversible and diminishes the leaf's appearance for its entire lifespan on the plant.
Common Mistakes
- Relying on misting for humidity: Misting creates brief, inconsistent humidity spikes and can leave water marks on the velvety surface. A dedicated humidifier maintaining 60-70% is the only reliable approach.
- Using tap water: Fluoride in municipal water causes leaf tip and margin damage that mimics humidity stress. Switch to filtered or rainwater and allow two to three months to see a full improvement in new growth.
- Using dense standard potting mix: This plant's epiphytic root system requires a chunky, fast-draining aroid mix. Standard potting mix causes chronic root rot that progresses invisibly until it's advanced.
- Repotting in fall or winter: A. clarinervium is slow to recover from root disturbance outside its active growing season. Spring repotting only, with minimal root handling.
- Rubbing the velvet leaves during cleaning: The papillae that create the velvet texture are fragile. Use a soft brush moving with the grain rather than a damp cloth that drags against the surface.
- Removing cataphylls from unfurling leaves: The papery sheath protecting a new leaf must be left until fully dried. Early removal damages the leaf inside, creating permanent creases or tears that compromise its appearance permanently.
Quick Reference Care Table
| Factor | Ideal Condition | Notes |
|---|---|---|
| Light | Bright indirect, east-facing 2-3 ft from glass | No direct sun; LED grow lights work well in winter |
| Water | When top inch of soil is dry | Every 5-14 days depending on season; filtered water only |
| Soil | Chunky aroid mix: potting mix, perlite, orchid bark, charcoal | Terra cotta pots preferred for breathability |
| Humidity | 60-70% | Dedicated humidifier required; misting is insufficient |
| Temperature | 65-85°F (18-30°C) | Keep away from cold drafts and windows below 65°F |
| Fertilizer | Half-strength balanced, monthly; CalMag every 6 weeks | April through September only |
| Repotting | Every 1-2 years in spring | Handle fleshy roots gently; up one pot size only |
Frequently Asked Questions
Why are the edges of my Anthurium clarinervium leaves turning brown?
Brown margins on otherwise firm, upright leaves almost always point to low humidity or fluoride in your water supply, often both simultaneously. Test by raising humidity above 60% with a humidifier while simultaneously switching to filtered water. New leaves that emerge after both changes should come in without browning if one or both of those factors was the cause. If browning continues on new growth despite these changes, check the roots for rot, which can cause leaf margin stress as a secondary symptom.
Does Anthurium clarinervium flower indoors?
Yes, though the flowers are modest compared to the foliage. The blooms are a typical aroid spathe-and-spadix structure, a pale greenish-white spathe with a narrow spadix, that appear periodically in mature plants. They are not showy in the way that A. andraeanum's waxy red spathes are, and most growers grow A. clarinervium exclusively for its foliage rather than its blooms. If a flower spike appears, you can leave it to develop fully or remove it at the base to redirect the plant's energy into foliage development, either choice is valid.
Is Anthurium clarinervium safe for cats and dogs?
No. Like all anthuriums, A. clarinervium contains calcium oxalate crystals throughout its plant tissue, which cause intense oral irritation, drooling, pawing at the mouth, and gastrointestinal distress if ingested by pets or humans. Keep it out of reach of pets and small children. If ingestion is suspected, contact your veterinarian or the ASPCA Animal Poison Control Center immediately. There is no antidote, but symptoms are generally self-limiting and supportive care is effective.
After a difficult first five months, my Anthurium clarinervium has become one of my most rewarding plants, precisely because once the conditions are right, each new leaf is a small event worth looking forward to. The velvet texture never gets old. If you want help with your exact setup, send the plant name, light, pot size, and recent watering notes through the contact page.
About the Author
Written by Sage Avery, a plant care writer at Plant Companion Guide. For how we create and update content, see our editorial policy.